I want to know. The other title for this post was "videographer porn" because seriously people, once you dig into any form of camera you start looking at all the junk you need to add in order to do other crap it was never meant to do out of the box... such as timelapse shots or massive data storage I mean, you do want 720PN not just 720P, right?? everyones doing it. And all I really wanted was to find a good NG Filter for the sunrise shots running through my head, just to keep my beautiful lens from getting hazed. Let me explain, this is a simple filter that reduces all the light waveforms. See. So how did I get from that to looking the newest datastorage that gives me native format 720 or 1080 but starts at $3k!! Forget it, I'm just going to carry a laptop.
But lets take a small break to see some beautiful timelapsing:
A
B
C
and the endless thread of more. Most of the above examples were made using still slr cameras with long shutter speeds. Compare this to something on video camera like an HVX and you can see why everyone takes reducing noise on dark shots so seriously.
STOP ME! I just wanted a simple $2 filter! Okay, maybe a $200 motorized pan mount.
20061210
microphones - shotgun, lav, hypercardioid
God, I dont want to get into the HVX100's internal amp's. Nor do I want to hack the internal mic to death like some crazy nutcases . I just want some decent audio to start with. I dont even mind the ambient noise of a room or out door. Though this thread does cover the most important pitfalls: avoid dialog in spaces with lots of hard surfaces that will reflect sound. Place your mic to point away from things that reflect where possible. Outdoors, obviously up. Get mic 2ft within audio source. Frame for this. (all this is debatable, and debated in formentioned thread).
shotgun microphones are generally used for outdoor. They are more directional. Different mic's work for different ranges. Pictures should be framed with this in mind. The recommended models range from $200 to $600. This is outside my budget for the time being but some i will note for the future are Rode NTG-2 $300, Audio Technica AT4073A $600 or AT835b $250. Lucky for me almost all my shots will be indoor so the shotgun is not something im digging into yet. If I have to Ill get a cheap ATR55 for $50. In all cases one needs a boom, shockmount (some recommend the K-SSM $20 which works with most of the shotguns i just listed ) and perhaps a wind screen.
Hypercardioid microphones are less directional and used indoors. Pretty much everyone seems to be convinced on the Oktava MK012 $200. And that appears to be what I'm going for.
Lav mics are for situations where the other two wont do. these are the clip on mics. not going there for now.
So my kit, a MK012 $200, Shockmount $20 and boom pole $80. Sound blankets. So $300.
20061206
3 point lighting
with camera in hand I have to start dealing with the other two important components, audio and lighting. im doing this using homebrewed equipment and have been looking around at both the typical needs with lighting (this is all new to me) and good kit suggestions. One has to start somewhere and I feel best working off a staple lighting technique and will make certain my kit at least covers this.
 3 point lighting - Key Light, Fill Light, Back/Edge Light:
Key "Light is the primary illumination for your subject. If you want a side look, the key light will be to the side. " Front, scary bottom lighting, etc. This is the dominant light source but should be diffused either with a gel or by reflecting it off. All other lights align in a T formation, with the key being at the bottom edge of the T.
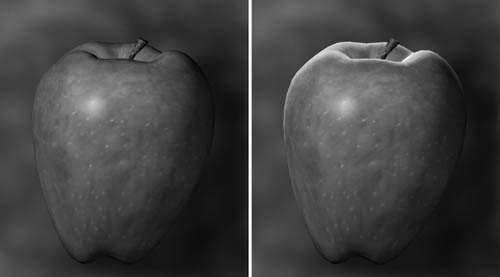
Fill lights are meant to diffuse the specular highlights. From what I gather they are meant to slightly diffuse harsh shadows from keylight. (Specular means "light reflecting off a smooth shiny surface is specular." Example: dealing with specular light when subject is in a glass jar)
 Back lights (aka Edge lights) offset the subject from the scene in the background by giving it a small highlight or edge. Adds a border. At times this light might be brighter than even the key.
All of the above provides 3 point lighting using separate lights. But in a scenario where the back/edge light is strong enough one could use a reflective screen on the other side to serve as a fill light, as discussed here. They also suggest this model applies to outdoor, with Sun (unmodified) as edge, ambient as fill and use a white matte board or aluminum foil to reflect the sun for key light.
What I want in my first kit
2 to hol. 3 lights, 1 nice spot light, a reflector. 1 or 2 Fomecore's to keep light from reflecting where I do not want it , dimmers, diffusion gel's for the fill lights to make them less harsh and more even where dimmers do not do the job, additional reflectors should I want to use existing or natural lighting. I can bring along car sunshields, aluminum foil+cardboard to use for rogue reflection. Would also like a Lastolite reflector ("silver/white and gold/white (the gold is good for warming up flesh tones"). Clips, both big and small. Loads of gaf tape. White and black cloth. A c stand and some extendable piping for hanging cloth. Several standard light bulbs (200watt) to replace and use existing lighting where possible. Power extensions with built in fuses to avoid blowing the main power. A light board (a board filled with LED's) would be nice instead of one of the lights as it takes less power.
All of the above serve for indoor and interview lighting. Next I will look at what modifications i need to make for outdoor shots and scenic highlights.
Subscribe to:
Comments (Atom)